How Are Git and GitHub Different? Your First Repo and the 9 Commands You Use Every Day
G
GnurtFull-stack developer
10 min read
In this article
You hear people say “commit to Git”, then you hear “push the code to GitHub”. The two names always go together, so it is easy to mix up Git vs GitHub and think they are the same thing. When you start asking an AI agent to edit code, you will need Git to see what it changed and to roll back if it breaks something.
In this article, we will tell Git and GitHub apart, create your first repo on your own machine, and get to know the 9 commands you use every day. The running example is a notes folder called notes.
Quick summary
Git runs on your computer and records the history of file changes. GitHub is where Git projects live online.
The 9 commands you use every day are status, add, commit, log, checkout, push, pull, cherry-pick and merge.
You can use Git without GitHub, but you need GitHub to back up and collaborate.
Git vs GitHub: what’s the difference?
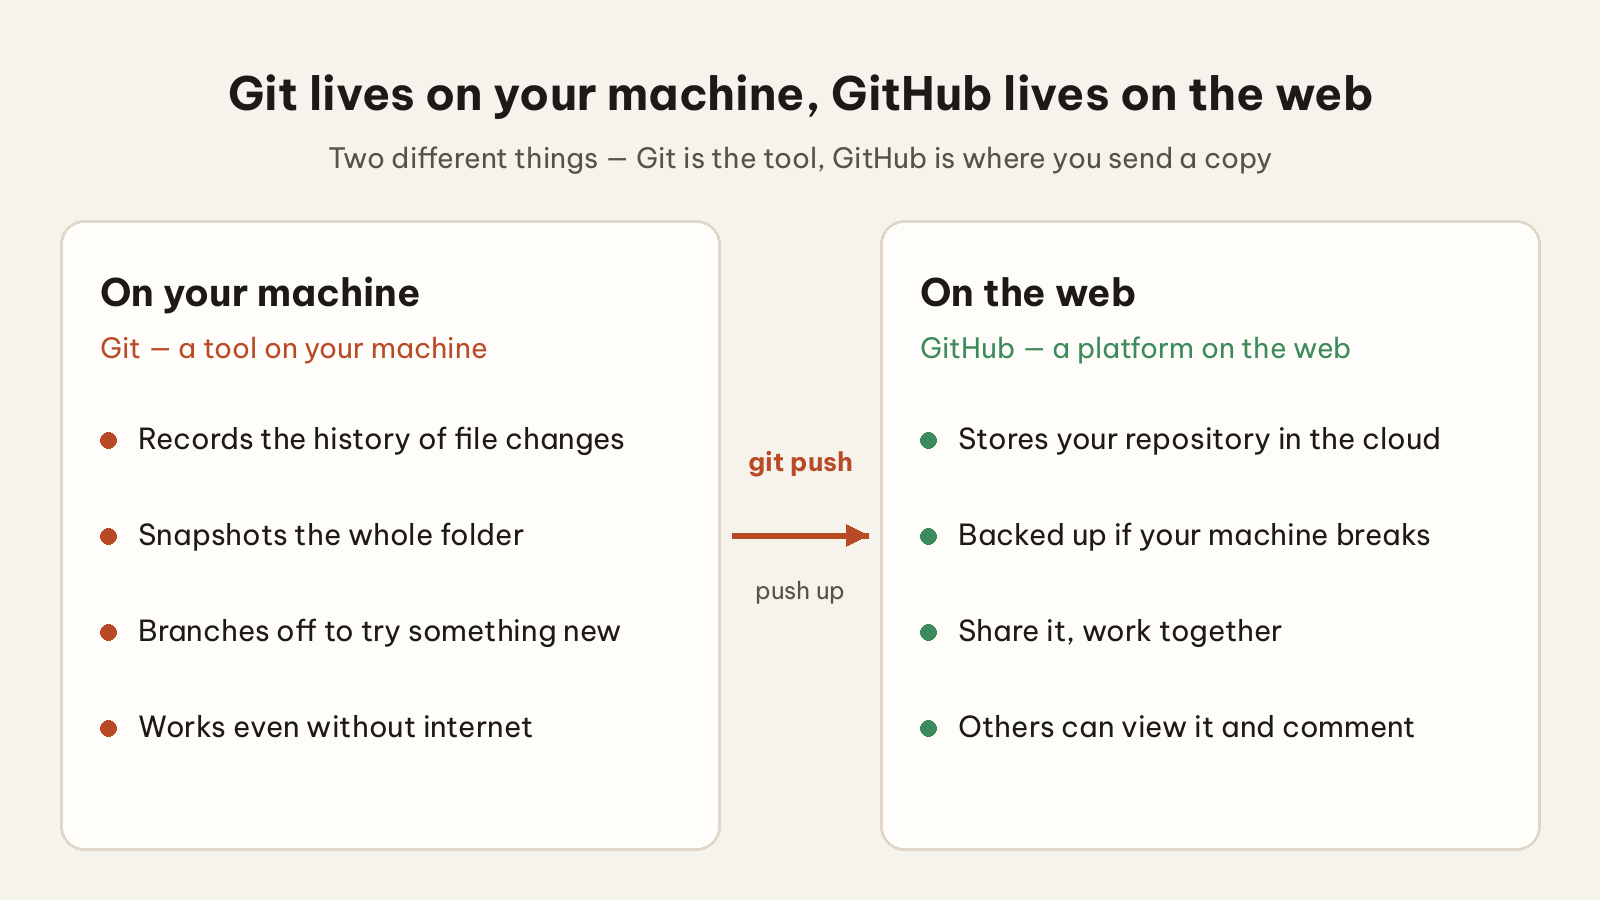
Git is a tool that runs on your computer to track file changes. GitHub is a web service for storing Git projects and working together. They are two different products, and Git still works perfectly well on its own.
Picture yourself writing a notebook. Git is like a version diary sitting next to it. Every time you are happy with a draft, you take a snapshot and note “added section 3”. To go back to yesterday’s version, you open the old snapshot. GitHub is like a storage locker online. You send copies of your snapshots there so you do not lose them if your computer breaks, and so other people can look at them.
The Git documentation puts it just right. Git treats data as a series of snapshots of the whole project folder. Almost everything runs on your computer, even when you have no network. GitHub’s documentation says GitHub builds on Git by storing Git projects, called repositories, in the cloud.
Git
GitHub
What it is
Tool for tracking file changes
Platform for hosting Git projects online
Where it runs
On your computer
On the web
Main job
Recording history, branching
Backing up, sharing, collaborating
Git runs on your computer, GitHub runs on the web — git push is the bridge between them.
How Do You Create Your First Repo on Your Machine?
You install Git, set your name and email once, then run git init in your project folder. A repo (repository) is a folder Git watches. Its history lives in the hidden .git folder. According to the documentation, git init creates this folder along with an initial branch that has no commits yet.
If your computer does not have Git yet, download it at git-scm.com and install it like any normal program. Once installed, open Git Bash and run git --version to check — if it prints a version number, Git is ready.
First, declare your identity. Git writes this name and email into every commit, so you only need to do it once per machine.
Then create the notes folder and initialise the repo. The -b main option names the initial branch main. On Windows, you can run these commands in Git Bash.
mkdir notes
cd notes
git init -b main
echo "# My notes" > notes.md
The last command creates a notes.md file. The repo now exists, but Git has not saved anything yet. Next come the nine commands that will turn this file into history.
Which 9 Git Commands Do You Use Every Day?
I picked status, add, commit, log, checkout, push, pull, cherry-pick and merge, because they repeat on almost every working day. The config, init and remote add commands only run once per machine or per project, so I do not count them.
Command
What it does
With notes
git status
See which files changed and which are ready to commit
See that notes.md is not tracked yet
git add
Move changes into the staging area
Select notes.md
git commit -m
Save what is staged as a point in history
The “Add first note” milestone
git log --oneline
View history, one commit per line
See the milestone you just saved
git checkout -b
Create a new branch and switch to it
The add-toc branch
git push
Send commits to GitHub
Push the commit history to GitHub
git pull
Fetch new commits from GitHub to your machine
Update main before continuing
git cherry-pick
Copy one commit from another branch over
Take one commit from add-toc
git merge
Merge another branch into the current branch
Merge the add-toc branch into main
The status, add, commit, log cycle
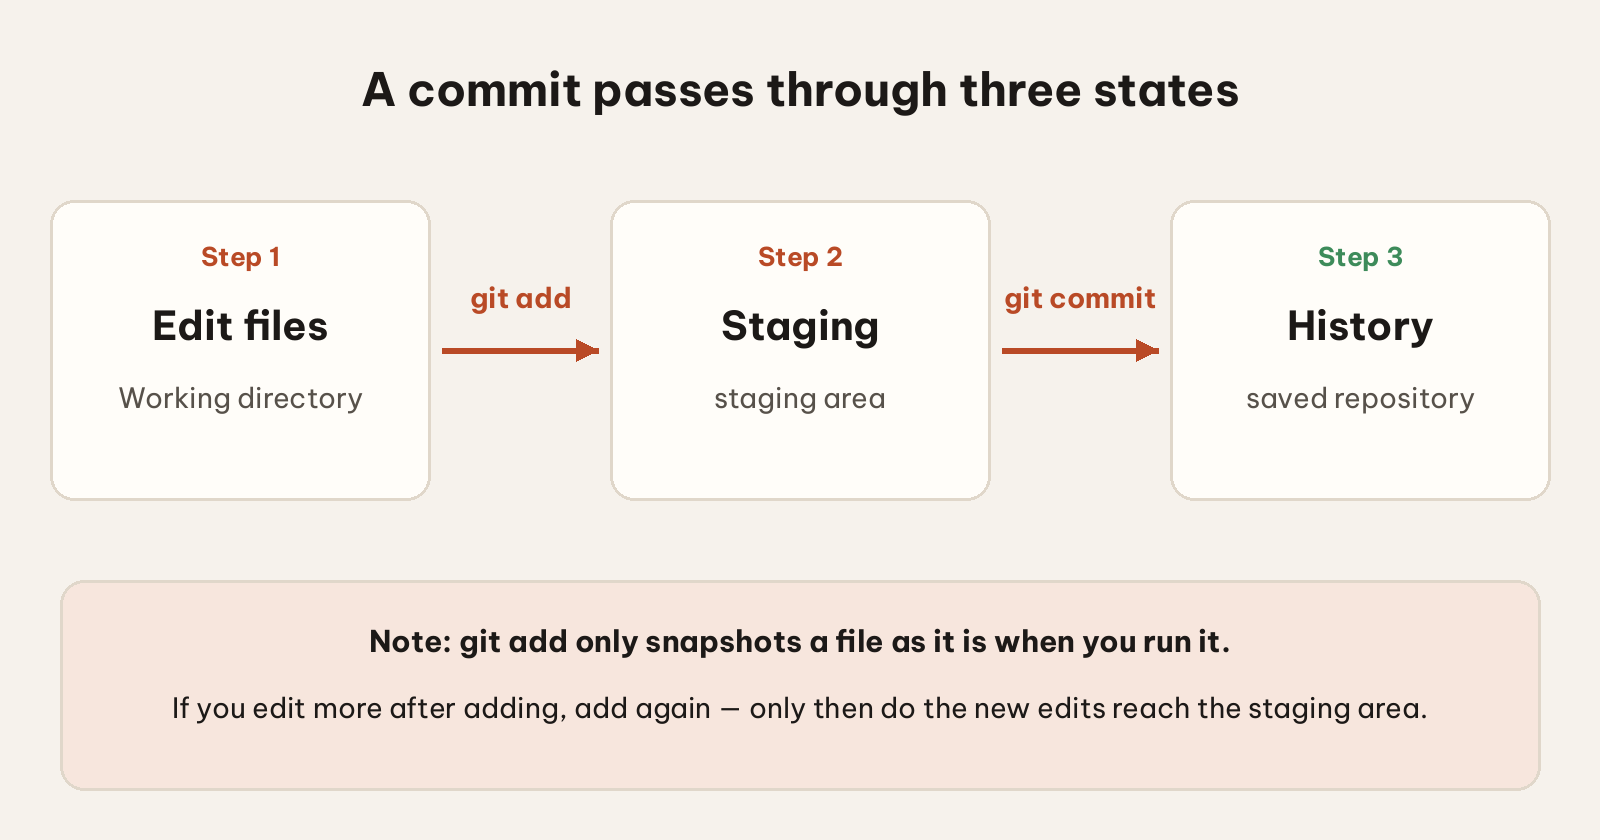
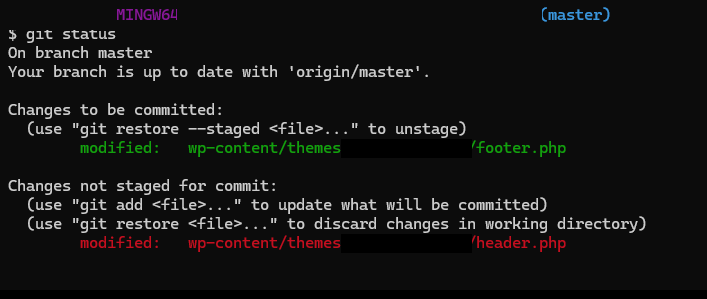
A commit passes through three states. A file is edited, then moved into the staging area, then committed. git add is the middle step. The documentation notes that git add only snapshots the file’s contents at the moment you run it. If you edit further, you must add it again.
A commit passes through three states: edit a file, stage it with git add, then commit it into history.Example: running git status after adding shows footer.php in the staging area, while header.php is still outside it.
git status
git add notes.md
git commit -m "Add first note"
git log --oneline
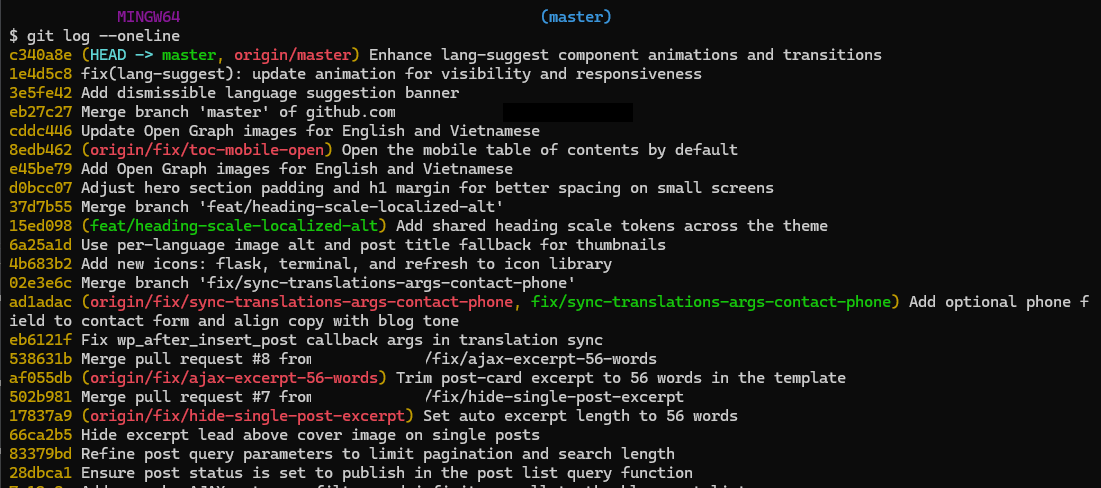
With git status, you will see three groups: changes already in the staging area (green), changes not yet staged (red), and files Git does not track yet. After you commit, git log --oneline prints one line per commit, showing the short hash and the title.
Example: git log –oneline lists one commit per line, newest at the top.
A new branch with checkout -b
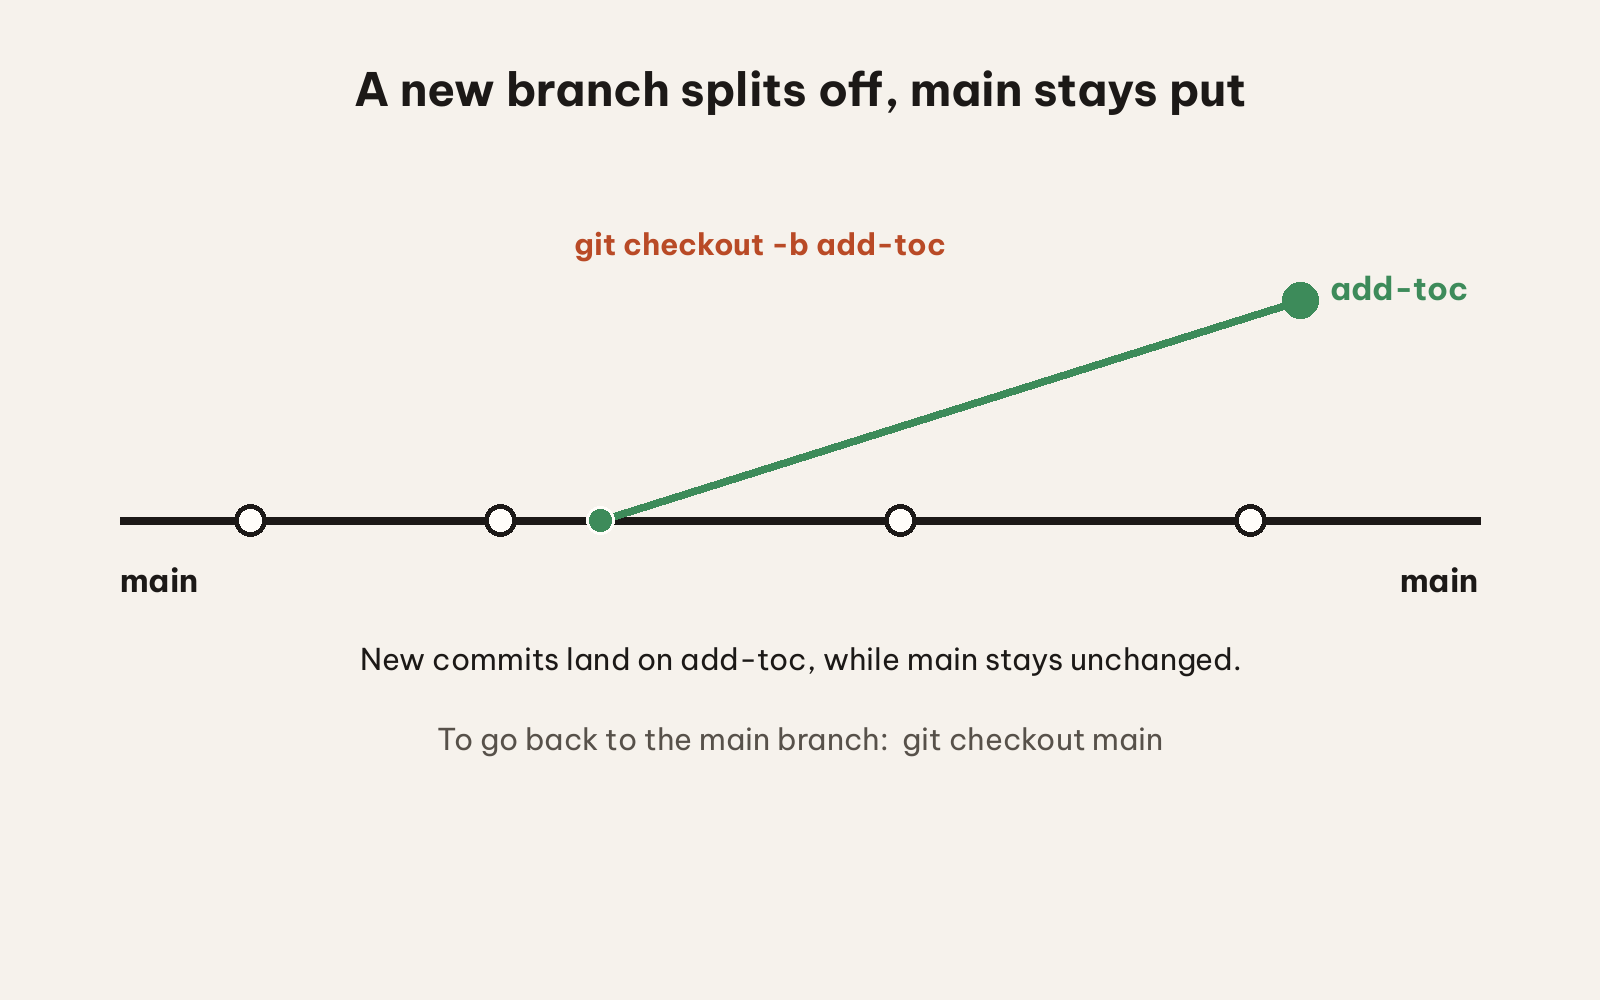
A branch lets you try something without touching the main branch. The command below creates the add-toc branch and switches to it right away.
git checkout -b add-toc
From now on, new commits go on the add-toc branch, while main stays unchanged. To go back to the main branch, run git checkout main.
git checkout -b creates a new branch and switches to it; to return to the main branch, run git checkout main.
Taking one commit from another branch with cherry-pick
Sometimes you only want one commit from another branch, not the whole branch. The cherry-pick command copies exactly that one commit onto your current branch.
git checkout main
git cherry-pick <commit-hash>
To get the commit hash, switch to the other branch and run git log --oneline; the hash is the string of characters at the start of each line. If Git reports a conflict, resolve it and then commit.
Fetching the latest version with pull
Push sends up, pull fetches down. Before you continue, run git pull to fetch the newest commits from GitHub onto your machine. Because you already used -u when you pushed, now you only need to type git pull — no need to add origin main. Working alone on one machine, you rarely need it, but when you collaborate or switch machines, pull is the command that opens every session.
git pull
Merging branches with merge
Cherry-pick takes just one commit, while merge takes the whole branch. To bring every commit from the other branch into the current branch, I use merge.
git checkout main
git merge add-toc
After merging, I run git log --oneline to see the commits that were just brought in. If Git reports a conflict, open the conflicting files, fix them so they are correct, then commit again.
How Do You Push Your Repo to GitHub?
You create an empty repo on GitHub, connect it to the repo on your machine with git remote add, then run git push. Because notes already has history on your machine, you only need to send that history up.
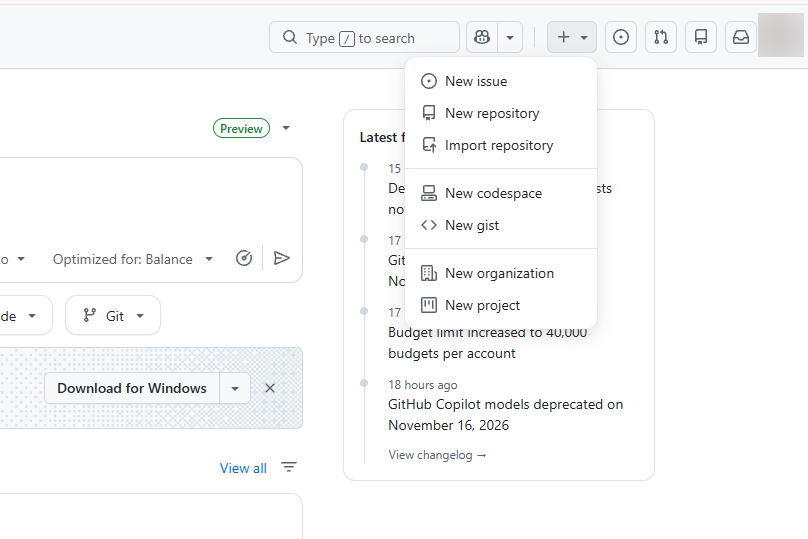
On GitHub, click the + in the top-right corner, then choose New repository.
Click the + in the top-right corner, then choose New repository.
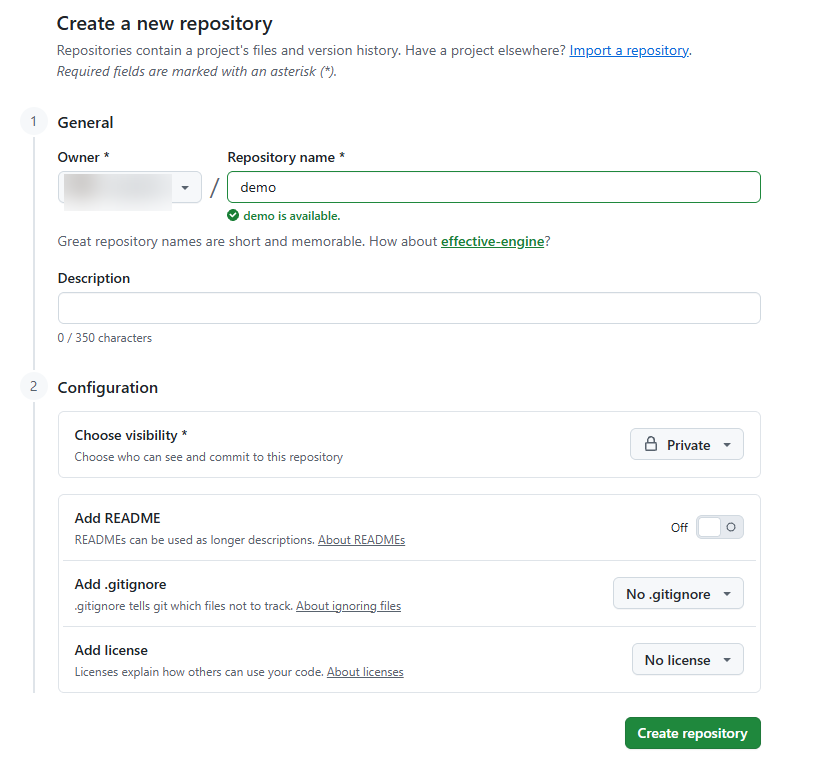
Name it notes and choose the visibility. For personal notes, I recommend private. Do not tick the boxes to add a README, a license or a .gitignore. GitHub’s documentation warns about this to avoid errors when pushing an existing repo.
Name the repo, choose private, and do not tick the boxes for a README, license or .gitignore.
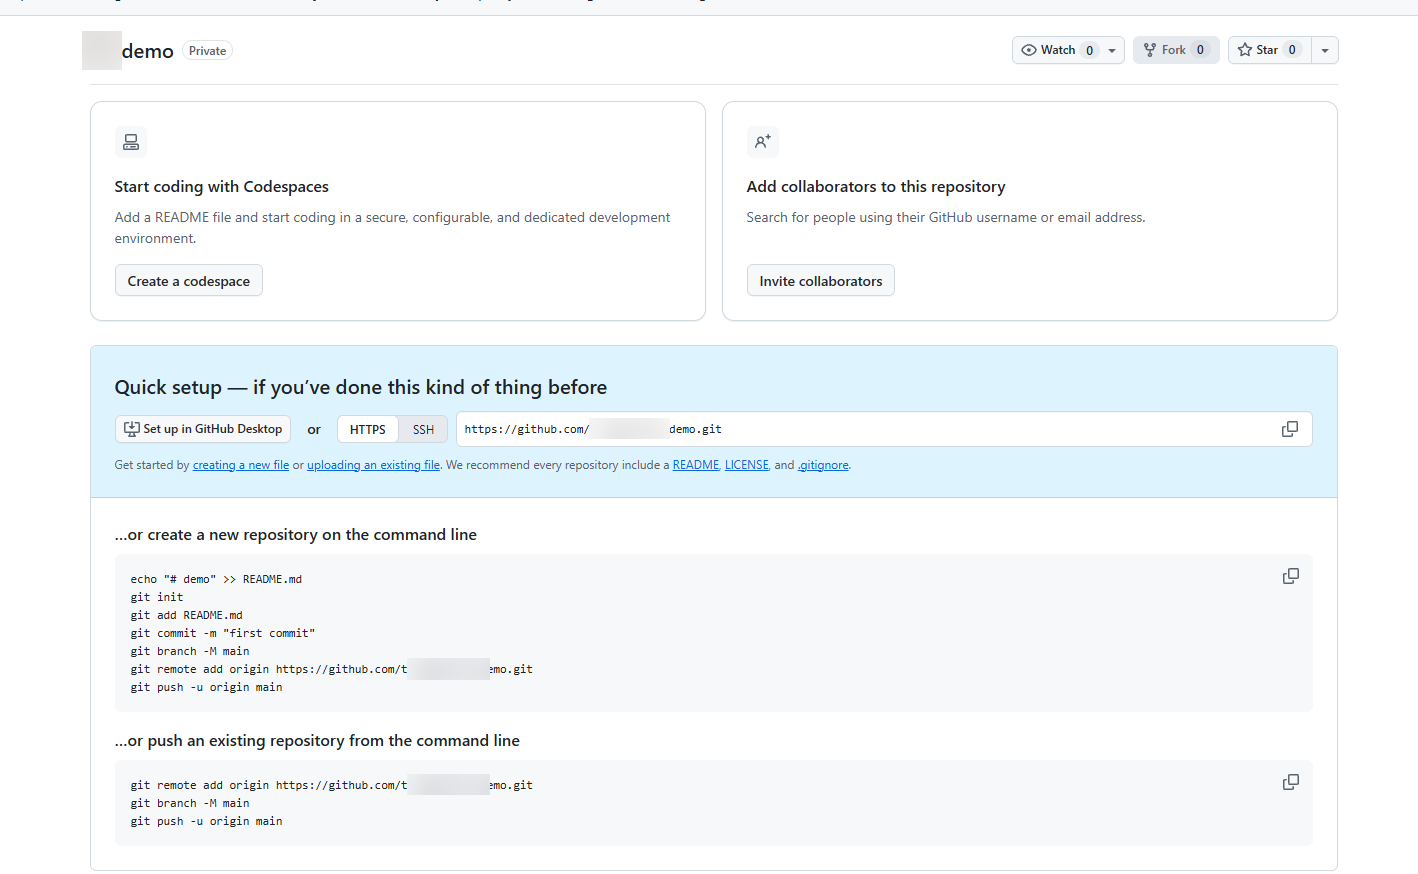
After creating it, copy the repo address from the GitHub page, then run the three commands below.
The new repo is created — copy the address from the Quick setup section, then run the commands on your machine.
origin is the name for the remote repository. Replace REPO-URL with the address you just copied.
The git remote -v command prints the address so you can check it again. The git push origin main command pushes the main branch on your machine up to the main branch of origin. The -u option remembers this branch pair, so next time you only need to type git push.
When you push for the first time, GitHub needs to know who you are. GitHub’s documentation recommends HTTPS with a credential helper so Git remembers your sign-in. SSH works too, but you have to create a key on each machine. You can also sign in with GitHub CLI.
To check, reload the repo page on GitHub. If you see notes.md, you are done. Next, try editing the file, then run pull, add, commit, push again, and create another branch. Once you are comfortable, read the article on git worktrees and sandboxes to give each agent its own branch. If you want to understand agents better, see What is Claude?.
Frequently asked questions
Do you need a GitHub account to use Git?
No. Git runs entirely on your computer. You can still commit, view history and create branches without an account. You only need GitHub when you want to back up or share.
Why does Git ask for your name and email?
Because every commit records this information. The Git documentation says it is permanently attached to the commits you create. You set it once with --global. To use a different name for one project, run the config command without --global inside that project.
How is git add . different from git add notes.md?
The . means the current folder. This command stages every new, modified and deleted file in that folder and its subfolders. It is convenient, but you should run git status first so you know what you are about to commit.
Is the default branch main or master?
The git init documentation says the current default name is master, and it will change to main when Git 3.0 is released. You can choose for yourself with git init -b main. Or set it permanently with git config --global init.defaultBranch main.
In the previous article, our small online shop had four jobs: accounts, products, cart and orders, and confirmation email. Suppose you have already split them into four services. Now a very practical question comes up. When a customer clicks “Place order”, how does the order service know the price of a product? And how does it...
Picture this: your laptop is at home, your phone is with you, and a server sits somewhere else. To open the server’s admin page from outside, you usually have to open a port on your router — which means configuring the router and leaving that port exposed to the internet. Tailscale skips that step: it connects...




Comments
You can use your Google account to comment. Google only shares your verified name and email address to display your name. You can log out at any time.
Sign in with GoogleNo comments yet. Be the first!